
·Guide
How to Execute JavaScript in Power Automate
Execute JavaScript code directly in Power Automate. Integrate JavaScript with CustomJS in 5 minutes – no Azure Functions needed.
power-automatejavascriptautomation
Microsoft Power Automate is powerful for workflow automation, but its built-in expressions and actions have limitations. When you need complex data transformations, API integrations, or custom business logic, JavaScript becomes essential.
The challenge: Power Automate doesn't support JavaScript natively. While Azure Functions offer one solution, they require infrastructure setup, deployment pipelines, and ongoing maintenance. For most workflows, this is overkill.
This comprehensive guide covers advanced JavaScript techniques in Power Automate using CustomJS. We'll explore real-world use cases, performance optimization, error handling, and best practices that go beyond basic scripting—helping you build production-ready flows that scale.
Power Automate's expression language handles simple tasks well—concatenating strings, basic math, date formatting. But it breaks down quickly when you need:
JavaScript solves these problems elegantly. With CustomJS in Power Automate, you get full JavaScript ES6+ support, npm packages, and async/await—all without managing servers or deployment pipelines.
Get started immediately with these production-ready templates. Search for "CustomJS" in Power Automate's template gallery to find them.
What it does:
Perfect for: Customer service teams, support departments, feedback analysis
Search for "Customer Sentiment Analysis with CustomJS" in Power Automate templates
The template uses lodash for text processing and sentiment analysis:
const _ = require('lodash');

const { feedbackText } = input;

// Define sentiment keywords
const positiveWords = ['great', 'excellent', 'amazing', 'love', 'perfect', 'wonderful', 'fantastic'];
const negativeWords = ['bad', 'terrible', 'awful', 'hate', 'poor', 'worst', 'disappointing'];

// Analyze text
const words = _.words(feedbackText.toLowerCase());
const positiveCount = _.intersection(words, positiveWords).length;
const negativeCount = _.intersection(words, negativeWords).length;

// Calculate sentiment score (-1 to 1)
const sentimentScore = (positiveCount - negativeCount) / words.length;

// Determine sentiment category
let sentiment = 'neutral';
if (sentimentScore > 0.1) sentiment = 'positive';
if (sentimentScore < -0.1) sentiment = 'negative';

// Generate recommendation
let recommendation = 'Standard response';
if (sentiment === 'negative') recommendation = 'Priority response - customer needs immediate attention';
if (sentiment === 'positive') recommendation = 'Thank customer and request review';

return {
  sentiment,
  sentimentScore: sentimentScore.toFixed(3),
  positiveWords: _.intersection(words, positiveWords),
  negativeWords: _.intersection(words, negativeWords),
  wordCount: words.length,
  recommendation,
  analyzedAt: new Date().toISOString()
};What it does:
Perfect for: Order ID generation, session management, data timestamping, expiry date calculations
Search for "Execute JavaScript Code with CustomJS" in Power Automate templates
The template uses moment.js and lodash for ID generation and date handling:
const moment = require('moment');
const _ = require('lodash');

// Generate unique customer ID
const customerId = `CUST-${moment().format('YYYYMMDD')}-${_.random(1000, 9999)}`;

// Generate session identifier
const sessionId = `SESSION-${_.random(100000, 999999)}`;

// Format timestamps
const now = moment();
const expiryDate = moment().add(30, 'days');

return {
  customerId,
  sessionId,
  timestamps: {
    iso: now.toISOString(),
    formatted: now.format('MMMM Do YYYY, h:mm:ss a'),
    unix: now.unix(),
    expiryDate: expiryDate.format('YYYY-MM-DD'),
    expiryUnix: expiryDate.unix(),
    daysUntilExpiry: 30
  },
  generatedAt: now.toISOString()
};add(30, 'days') to any duration_.random() parameters for different ID lengths| Limitation | Power Automate | JavaScript Solution |
|---|---|---|
| Array Operations | Limited to filter/select/map | Full array methods: reduce, flatMap, groupBy |
| API Calls | HTTP action only, no retry logic | Axios with interceptors, retries, timeouts |
| Date Manipulation | Basic addDays/formatDateTime | moment.js, date-fns for complex operations |
| Error Handling | Try-catch at action level | Granular try-catch, custom error messages |
| Encryption | Not supported | crypto-js for AES, RSA, HMAC |
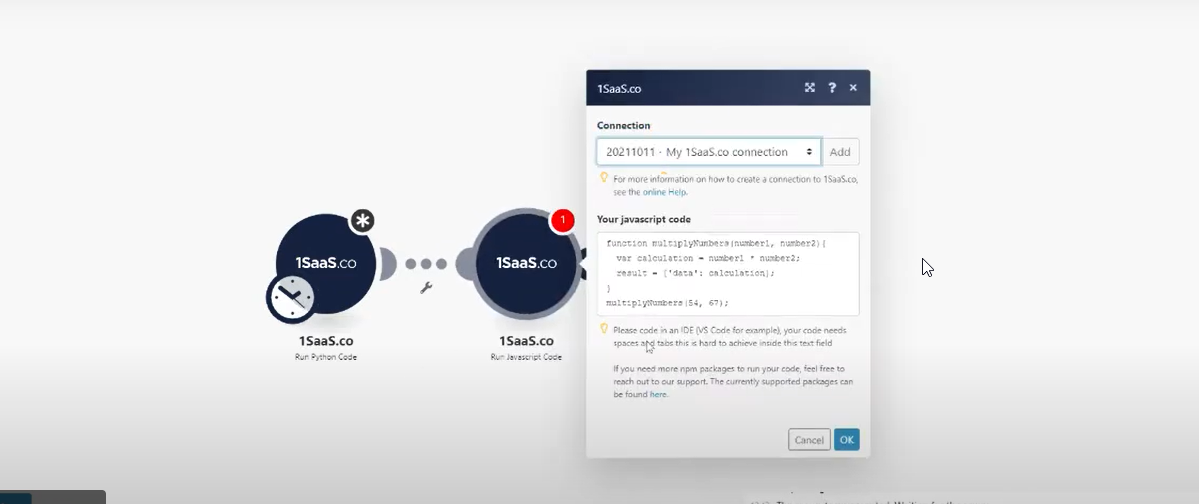
Before diving into advanced techniques, let's set up CustomJS in Power Automate. This takes less than 5 minutes.
Every CustomJS action follows this pattern:
// Input from Power Automate (JSON object)
const { customerName, orderTotal, items } = input;

// Your JavaScript logic
const processedData = items.map(item => ({
  ...item,
  taxAmount: item.price * 0.19,
  total: item.price * item.quantity
}));

// Return data to Power Automate
return {
  customerName,
  orderTotal,
  processedItems: processedData,
  itemCount: items.length
};Power Automate's HTTP action is limited. With JavaScript, you can make sophisticated API calls with retry logic, custom headers, and proper error handling.
Enrich customer records by calling multiple APIs (address validation, company data, credit score):
const axios = require('axios');

async function enrichCustomer(customer) {
  try {
    // Call multiple APIs in parallel
    const [addressData, companyData, creditScore] = await Promise.all([
      axios.get(`https://api.address-validator.com/validate`, {
        params: { address: customer.address },
        headers: { 'Authorization': `Bearer ${process.env.ADDRESS_API_KEY}` },
        timeout: 5000
      }),
      axios.get(`https://api.company-data.com/lookup`, {
        params: { company: customer.companyName },
        timeout: 5000
      }),
      axios.get(`https://api.credit-check.com/score`, {
        params: { email: customer.email },
        timeout: 5000
      })
    ]);

    return {
      ...customer,
      addressValidated: addressData.data.isValid,
      companySize: companyData.data.employeeCount,
      creditScore: creditScore.data.score,
      enrichedAt: new Date().toISOString()
    };
  } catch (error) {
    // Graceful error handling
    return {
      ...customer,
      enrichmentError: error.message,
      enrichmentFailed: true
    };
  }
}

return await enrichCustomer(input.customer);
This example calls three APIs in parallel, handles timeouts, and returns enriched data or error details.
Power Automate struggles with nested JSON and complex array operations. JavaScript excels at this.
Group invoice items by category, calculate subtotals, apply discounts, and compute taxes:
const { items, discountRules, taxRate } = input;

// Group items by category
const groupedItems = items.reduce((acc, item) => {
  const category = item.category || 'Other';
  if (!acc[category]) {
    acc[category] = [];
  }
  acc[category].push(item);
  return acc;
}, {});

// Calculate totals per category
const categoryTotals = Object.entries(groupedItems).map(([category, items]) => {
  const subtotal = items.reduce((sum, item) => sum + (item.price * item.quantity), 0);

  // Apply category-specific discount
  const discount = discountRules[category] || 0;
  const discountAmount = subtotal * discount;
  const afterDiscount = subtotal - discountAmount;

  // Calculate tax
  const taxAmount = afterDiscount * taxRate;
  const total = afterDiscount + taxAmount;

  return {
    category,
    itemCount: items.length,
    subtotal: subtotal.toFixed(2),
    discountPercent: (discount * 100).toFixed(0),
    discountAmount: discountAmount.toFixed(2),
    taxAmount: taxAmount.toFixed(2),
    total: total.toFixed(2),
    items: items.map(i => ({
      name: i.name,
      quantity: i.quantity,
      price: i.price,
      lineTotal: (i.price * i.quantity).toFixed(2)
    }))
  };
});

// Calculate grand total
const grandTotal = categoryTotals.reduce((sum, cat) => sum + parseFloat(cat.total), 0);

return {
  categories: categoryTotals,
  grandTotal: grandTotal.toFixed(2),
  totalItems: items.length,
  generatedAt: new Date().toISOString()
};CustomJS supports popular npm packages out of the box. This unlocks powerful libraries for date manipulation, validation, encryption, and more.
The following NPM modules are available for use in CustomJS. Contact us if you would like to use another NPM module in Power Automate.
const cheerio = require('cheerio');
const { v4: uuidv4 } = require('uuid');
const axios = require('axios').default;
const AWS = require('@aws-sdk/client-s3');
const jsrsasign = require('jsrsasign');
const forge = require('node-forge');
const { piexif } = require('piexifjs');
const jsrsasignUtil = require('jsrsasign-util');
const jsonwebtoken = require('jsonwebtoken');
const crypto = require('crypto');
const { Configuration, OpenAIApi } = require('openai');
const JavaScriptObfuscator = require('javascript-obfuscator');
const { AuthRocket } = require('@authrocket/authrocket-node');
const firebaseAdmin = require('firebase-admin');
const { PDFDocument, StandardFonts, rgb } = require('pdf-lib');
const mysql2 = require('mysql2');
const cryptoJs = require('crypto-js');
const nodemailer = require('nodemailer');
const converter = require('json-2-csv');
const htmlToText = require('html-to-text');
const moment = require('moment');
const Alexa = require('ask-sdk-core');
const jose = require('jose');
const { nanoid } = require('nanoid');
const { getJson } = require('serpapi');
const { Storage } = require('@google-cloud/storage');
Popular modules include: axios for HTTP requests, moment for dates, lodash for utilities, crypto-js for encryption, jsonwebtoken for JWT, and many more.
const moment = require('moment');

const { startDate, subscriptionType } = input;

// Calculate subscription end date based on type
const start = moment(startDate);
let endDate;

switch(subscriptionType) {
  case 'monthly':
    endDate = start.add(1, 'month');
    break;
  case 'quarterly':
    endDate = start.add(3, 'months');
    break;
  case 'annual':
    endDate = start.add(1, 'year');
    break;
  default:
    endDate = start.add(1, 'month');
}

// Calculate business days (excluding weekends)
const businessDays = [];
let current = moment(startDate);
while (current.isBefore(endDate)) {
  if (current.day() !== 0 && current.day() !== 6) {
    businessDays.push(current.format('YYYY-MM-DD'));
  }
  current.add(1, 'day');
}

return {
  startDate: start.format('YYYY-MM-DD'),
  endDate: endDate.format('YYYY-MM-DD'),
  daysTotal: endDate.diff(start, 'days'),
  businessDays: businessDays.length,
  renewalDate: endDate.format('MMMM Do, YYYY'),
  daysUntilRenewal: endDate.diff(moment(), 'days')
};Prevent errors before they happen by validating data with schema validation libraries.
const Joi = require('joi');

// Define validation schema
const customerSchema = Joi.object({
  email: Joi.string().email().required(),
  name: Joi.string().min(2).max(100).required(),
  phone: Joi.string().pattern(/^\+?[1-9]\d{1,14}$/).required(),
  age: Joi.number().integer().min(18).max(120),
  address: Joi.object({
    street: Joi.string().required(),
    city: Joi.string().required(),
    zipCode: Joi.string().pattern(/^\d{5}$/).required(),
    country: Joi.string().length(2).required()
  }).required(),
  subscriptionType: Joi.string().valid('free', 'basic', 'premium').required()
});

// Validate input data
const { error, value } = customerSchema.validate(input.customer, {
  abortEarly: false // Get all errors, not just the first
});

if (error) {
  return {
    isValid: false,
    errors: error.details.map(err => ({
      field: err.path.join('.'),
      message: err.message
    })),
    customer: input.customer
  };
}

return {
  isValid: true,
  customer: value,
  validatedAt: new Date().toISOString()
};Transform incoming webhook data from third-party services into your internal format:
// Shopify webhook → Internal CRM format
const { order } = input;

return {
  customerId: order.customer.id,
  customerName: `${order.customer.first_name} ${order.customer.last_name}`,
  email: order.customer.email,
  orderTotal: parseFloat(order.total_price),
  currency: order.currency,
  items: order.line_items.map(item => ({
    productId: item.product_id,
    sku: item.sku,
    name: item.name,
    quantity: item.quantity,
    price: parseFloat(item.price),
    total: parseFloat(item.price) * item.quantity
  })),
  shippingAddress: {
    street: order.shipping_address.address1,
    city: order.shipping_address.city,
    zip: order.shipping_address.zip,
    country: order.shipping_address.country_code
  },
  orderDate: new Date(order.created_at).toISOString(),
  status: order.financial_status
};Calculate prices based on complex business rules:
const { product, quantity, customerTier, region } = input;

// Base price
let price = product.basePrice;

// Volume discount
if (quantity >= 100) price *= 0.85;
else if (quantity >= 50) price *= 0.90;
else if (quantity >= 10) price *= 0.95;

// Customer tier discount
const tierDiscounts = { bronze: 0.95, silver: 0.90, gold: 0.85, platinum: 0.80 };
price *= tierDiscounts[customerTier] || 1;

// Regional pricing
const regionalMultipliers = { US: 1, EU: 1.15, APAC: 1.10 };
price *= regionalMultipliers[region] || 1;

// Calculate final totals
const subtotal = price * quantity;
const tax = subtotal * 0.19;
const total = subtotal + tax;

return {
  unitPrice: price.toFixed(2),
  quantity,
  subtotal: subtotal.toFixed(2),
  tax: tax.toFixed(2),
  total: total.toFixed(2),
  discountsApplied: {
    volume: quantity >= 10,
    customerTier: customerTier !== 'standard',
    regional: region !== 'US'
  }
};Generate personalized HTML emails with dynamic content:
const { customer, order, items } = input;

const itemsHTML = items.map(item => `
  <tr>
    <td style="padding: 10px; border-bottom: 1px solid #eee;">${item.name}</td>
    <td style="padding: 10px; border-bottom: 1px solid #eee;">${item.quantity}</td>
    <td style="padding: 10px; border-bottom: 1px solid #eee;">$${item.price}</td>
    <td style="padding: 10px; border-bottom: 1px solid #eee;">$${(item.quantity * item.price).toFixed(2)}</td>
  </tr>
`).join('');

const emailHTML = `
<!DOCTYPE html>
<html>
<head>
  <style>
    body { font-family: Arial, sans-serif; line-height: 1.6; color: #333; }
    .container { max-width: 600px; margin: 0 auto; padding: 20px; }
    .header { background: #4F46E5; color: white; padding: 20px; text-align: center; }
    table { width: 100%; border-collapse: collapse; margin: 20px 0; }
    th { background: #f5f5f5; padding: 10px; text-align: left; }
    .total { font-size: 18px; font-weight: bold; text-align: right; margin-top: 20px; }
  </style>
</head>
<body>
  <div class="container">
    <div class="header">
      <h1>Order Confirmation</h1>
    </div>
    <p>Hi ${customer.name},</p>
    <p>Thank you for your order! Here are the details:</p>
    <table>
      <thead>
        <tr>
          <th>Product</th>
          <th>Quantity</th>
          <th>Price</th>
          <th>Total</th>
        </tr>
      </thead>
      <tbody>
        ${itemsHTML}
      </tbody>
    </table>
    <div class="total">Total: $${order.total}</div>
    <p>Order Number: #${order.id}</p>
    <p>We'll send you a shipping confirmation once your order is on its way.</p>
  </div>
</body>
</html>
`;

return {
  to: customer.email,
  subject: `Order Confirmation #${order.id}`,
  htmlBody: emailHTML
};Only pass necessary data to JavaScript actions. Large JSON payloads increase execution time:
// ❌ Bad: Passing entire object with unnecessary fields
{
  customer: entireCustomerObject, // 50+ fields
  order: entireOrderObject // 100+ fields
}

// ✅ Good: Only pass what you need
{
  customerId: customer.id,
  customerEmail: customer.email,
  orderTotal: order.total,
  items: order.items.map(i => ({ id: i.id, price: i.price }))
}When calling multiple APIs, use Promise.all() instead of sequential await:
// ❌ Slow: Sequential (6 seconds total)
const result1 = await api1(); // 2 seconds
const result2 = await api2(); // 2 seconds
const result3 = await api3(); // 2 seconds

// ✅ Fast: Parallel (2 seconds total)
const [result1, result2, result3] = await Promise.all([
  api1(),
  api2(),
  api3()
]);Store results of expensive calculations to avoid recomputation:
// Use memoization for repeated calculations
const memoize = (fn) => {
  const cache = new Map();
  return (...args) => {
    const key = JSON.stringify(args);
    if (cache.has(key)) return cache.get(key);
    const result = fn(...args);
    cache.set(key, result);
    return result;
  };
};

const expensiveCalculation = memoize((value) => {
  // Complex calculation here
  return value * Math.pow(2, 20);
});Make errors actionable in Power Automate by returning structured error objects:
try {
  const result = await riskyOperation();
  return {
    success: true,
    data: result
  };
} catch (error) {
  return {
    success: false,
    error: {
      message: error.message,
      code: error.code || 'UNKNOWN_ERROR',
      timestamp: new Date().toISOString(),
      retryable: error.retryable || false
    }
  };
}Handle transient failures with exponential backoff:
async function retryWithBackoff(fn, maxRetries = 3) {
  for (let i = 0; i < maxRetries; i++) {
    try {
      return await fn();
    } catch (error) {
      if (i === maxRetries - 1) throw error;
      const delay = Math.pow(2, i) * 1000; // 1s, 2s, 4s
      await new Promise(resolve => setTimeout(resolve, delay));
    }
  }
}

const data = await retryWithBackoff(() =>
  axios.get('https://api.example.com/data')
);CustomJS supports the most popular npm packages. If you need a specific package, contact support to request it.
JavaScript code has a 30-second execution limit. For longer operations, break them into smaller chunks or use async patterns.
Use try-catch blocks and return detailed error objects. You can also test code locally before deploying to Power Automate.
Yes. All data is encrypted in transit (HTTPS) and at rest. CustomJS is SOC 2 compliant and doesn't store your data after execution.
Absolutely. Use axios or fetch to call any REST API. You can include custom headers, authentication, and handle responses.
JavaScript transforms Power Automate from a simple workflow tool into a powerful automation platform. With CustomJS, you get:
Whether you're enriching CRM data, processing invoices, validating webhooks, or building complex business logic, JavaScript in Power Automate makes it possible—without Azure Functions overhead.
Start using JavaScript in Power Automate today →
Continue reading on similar topics
Execute JavaScript code directly in Power Automate. Integrate JavaScript with CustomJS in 5 minutes – no Azure Functions needed.

A deep dive into the top 5 screenshot APIs for 2025, comparing features, pricing, and performance to help you choose the best one.
If you want to improve your workflow in Make with JavaScript, there are some powerful tools available. Two of the best options are 0CodeKit and CustomJS.

Learn how to automate PDF generation in Make.com with CustomJS. Step-by-step guide with templates for invoices, HTML to PDF, and page extraction. 600 free PDFs/month.

Learn how to automate PDF generation in n8n workflows. Complete guide covering HTML to PDF conversion, invoice generation, and workflow templates.

Cost-effective alternative to QuickBooks & FreshBooks. Automatic PDF invoice generation with n8n, Make.com, or API integration.

Explore CustomJS as a powerful IFTTT alternative. See how it compares to IFTTT for custom and advanced automation and which tool suits your needs.

Automate complex tasks without blowing your budget! Learn how Make, Zapier, & n8n enable custom JS automation at various price points.

Choosing the right workflow automation tool between Make, Zapier, and n8n depends on your tech comfort, task complexity, and budget.